Add an employee
Create an employee record, assign it to a department, and attach supporting documents.
Overview
Adding an employee walks through a four-step wizard — Personal, Employment, Documents, Review — rather than a single form. The last step, Review, shows everything you entered grouped by step, each group with its own Edit link that jumps you straight back to that step without losing anything you've already typed elsewhere in the form.
Every employee belongs to a department, so a department has to exist before you can finish adding an employee — see Create a department if you don't have one yet.
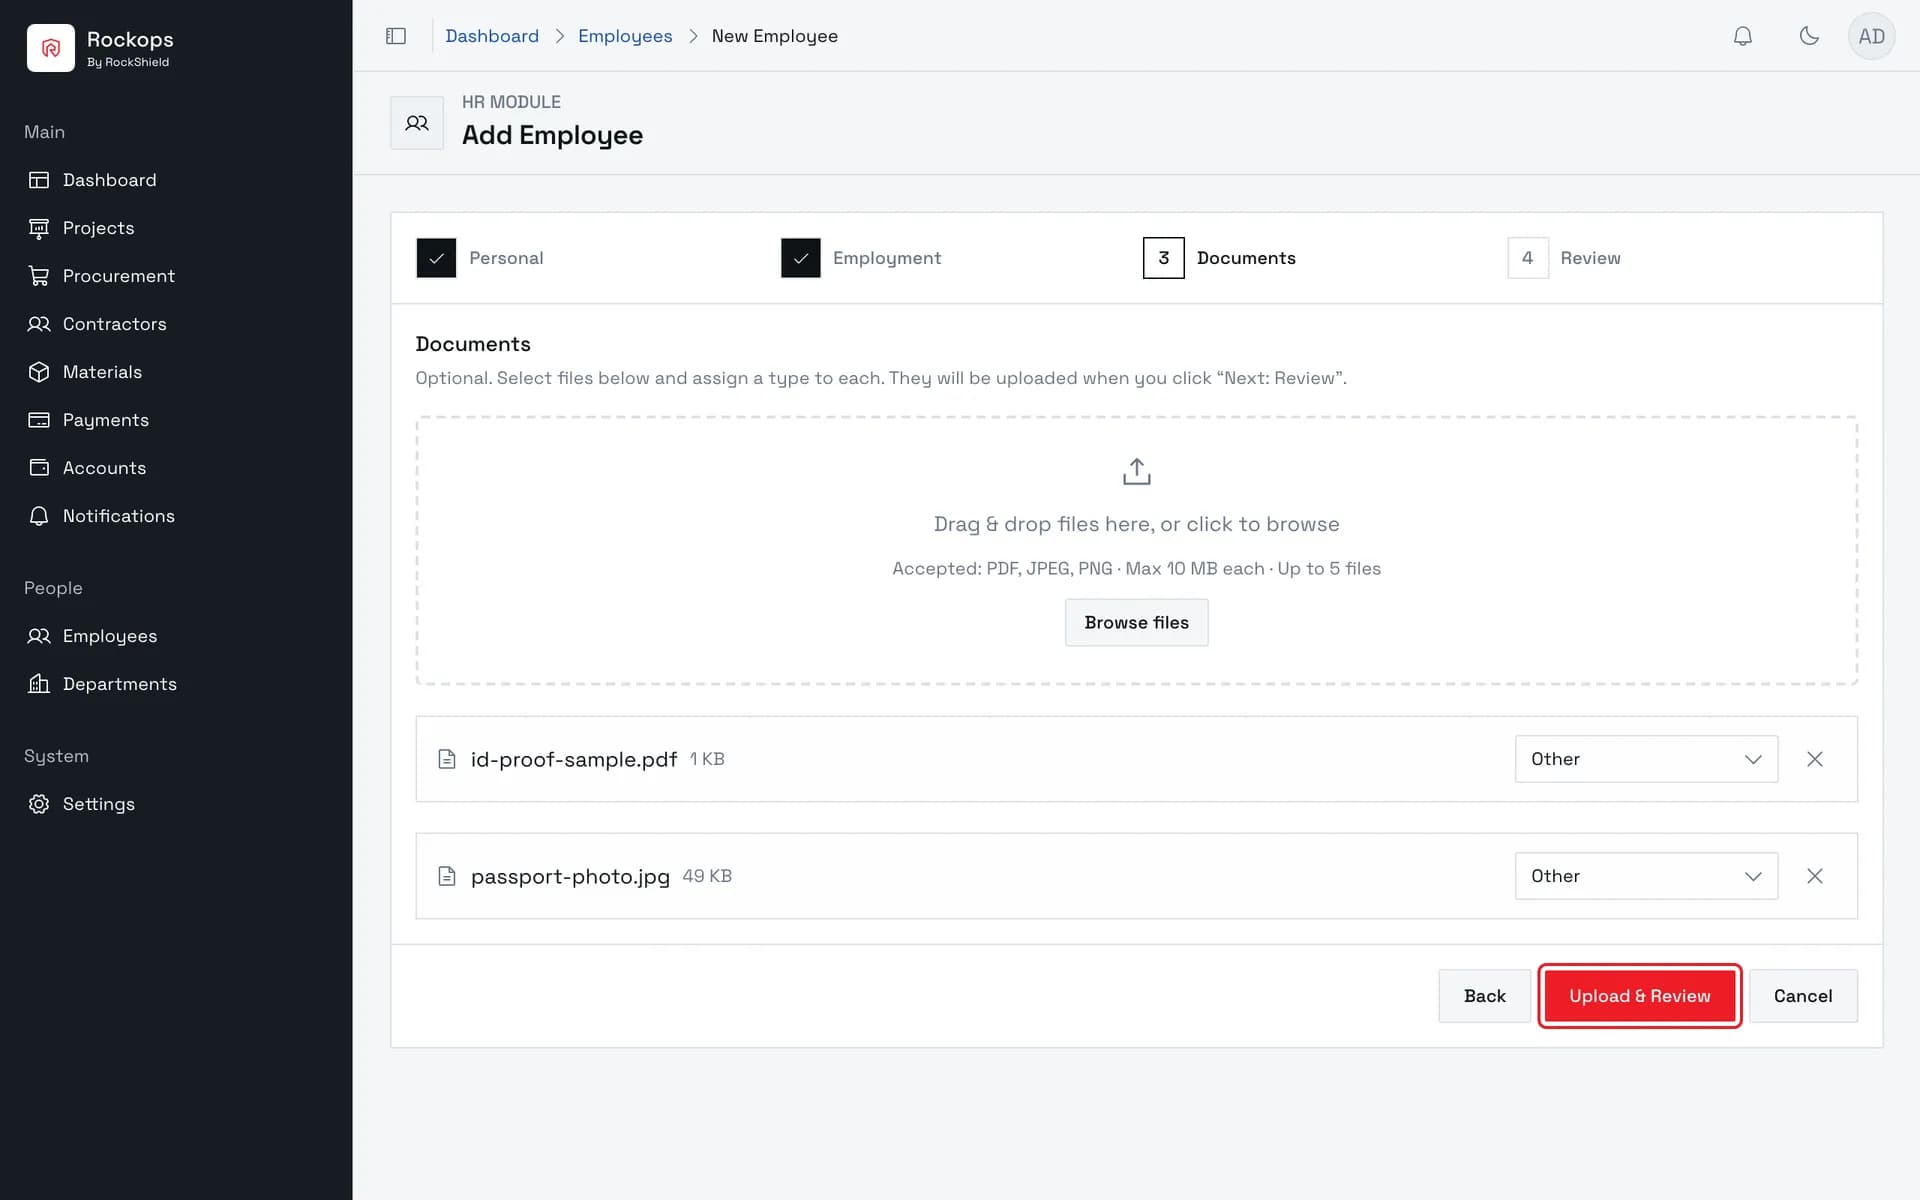
Supporting documents (ID proof, offer letter, and similar) are optional and can be attached in step 3, but here's the part that catches people out: selecting a file does not upload it. Files you choose are only staged locally. The real upload to storage happens when you leave the Documents step and continue to Review — the primary button even changes its label from "Next: Review" to "Upload & Review" once files are staged, and clicking it uploads before the wizard advances. If that upload fails, the wizard stays on the Documents step so you can retry.
If you haven't staged or uploaded anything at all on the Documents step, a second, secondary button — "Skip, Review →" — appears next to the primary one, letting you jump straight to Review without touching Documents. Stage a file, or upload one and come back, and that secondary button disappears; only the primary "Next: Review" / "Upload & Review" button remains.
Before you start
Employees live under People → Employees, and — like Departments — that section is only visible to organization roles that can read HR data: Administrator, Owner, Human Resources, and Organization Manager.
As with departments, being able to see the list isn't the same as being able to create one. Only Administrator, Owner, and Human Resources can actually submit the wizard — an Organization Manager can open Employees, click Add Employee, and fill out all four steps, but the server rejects the create request on submit. If you're signed in as an Organization Manager and Create Employee isn't working, this is why.
Have the employee's department decided before you start — Employment step won't let you continue without picking one from the list of existing departments.
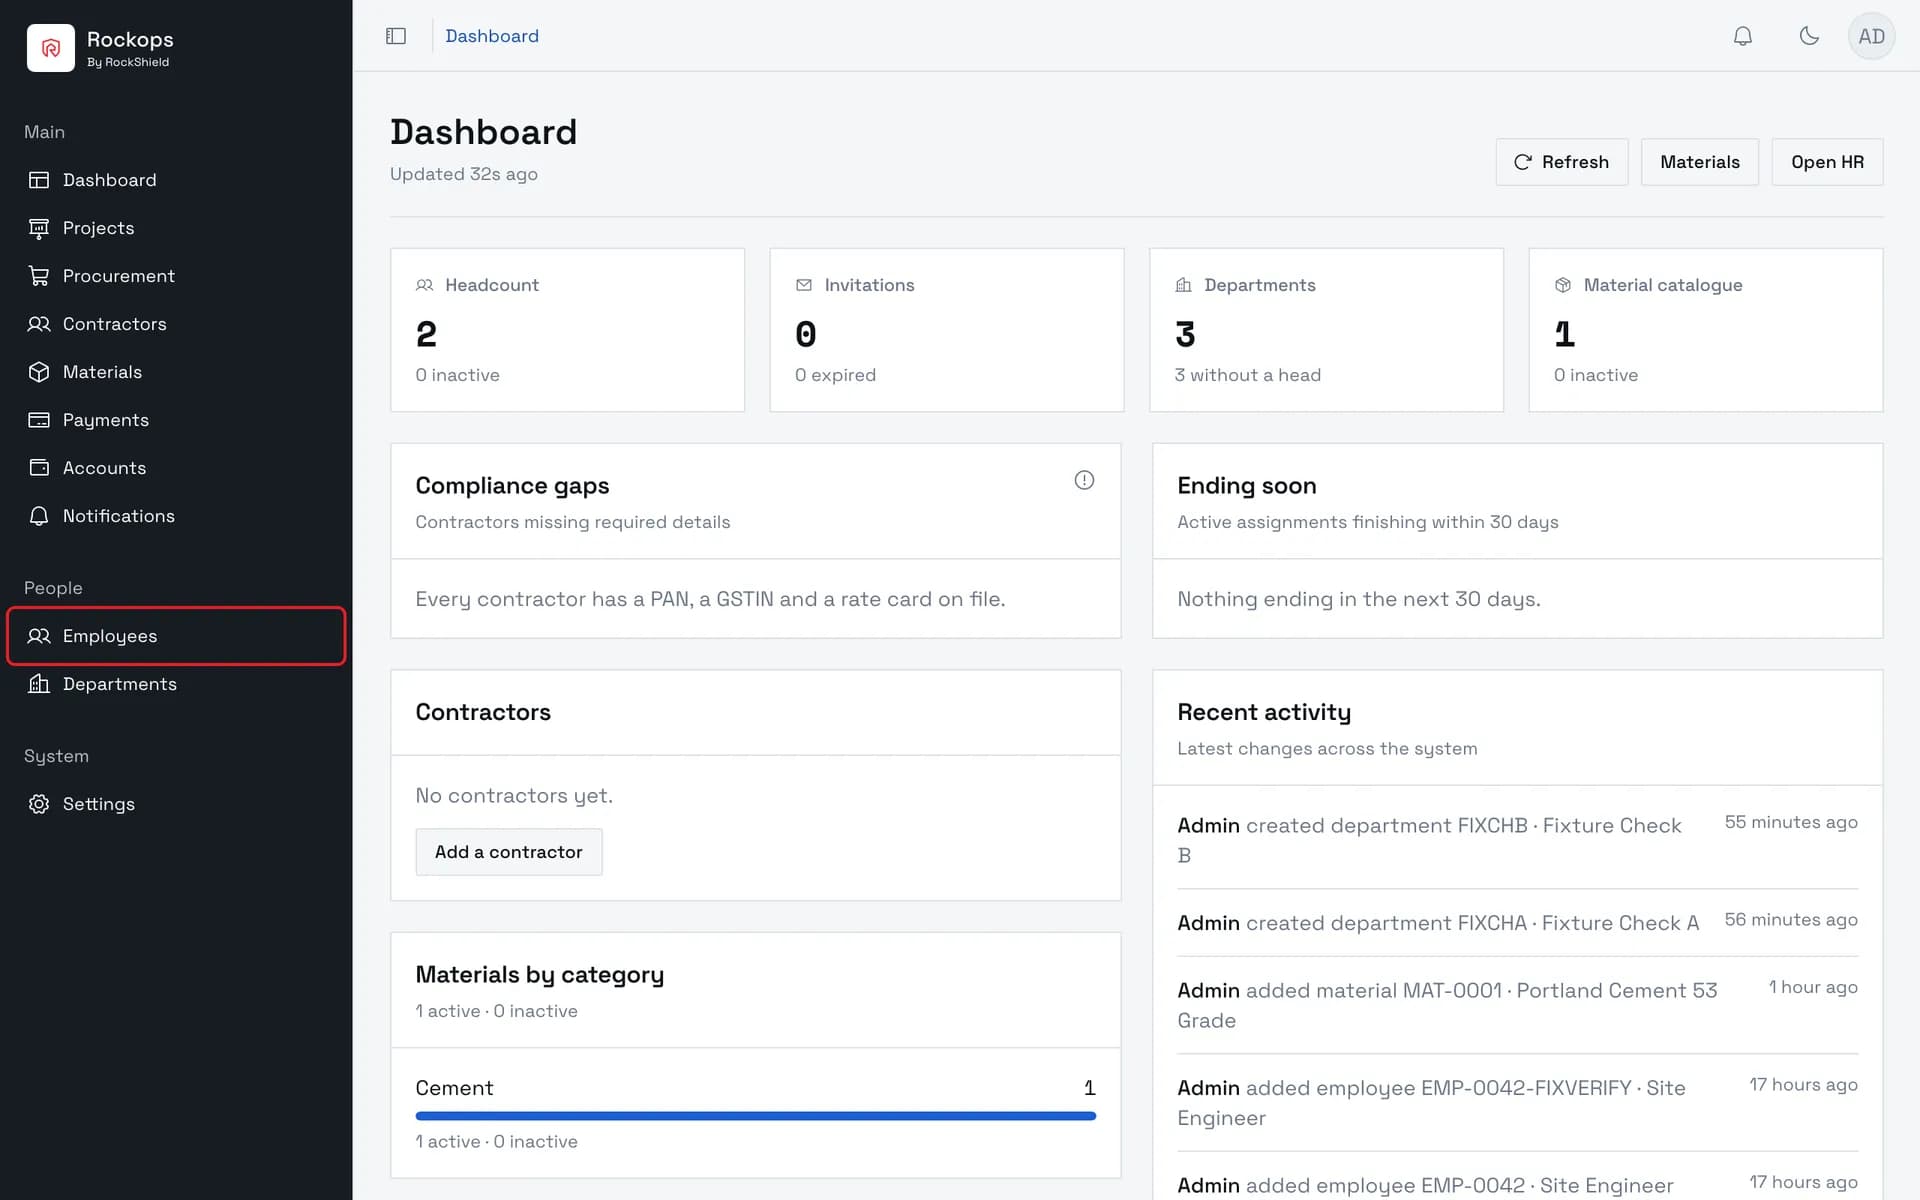
1. Open Employees
Employees lives under the People section of the sidebar.
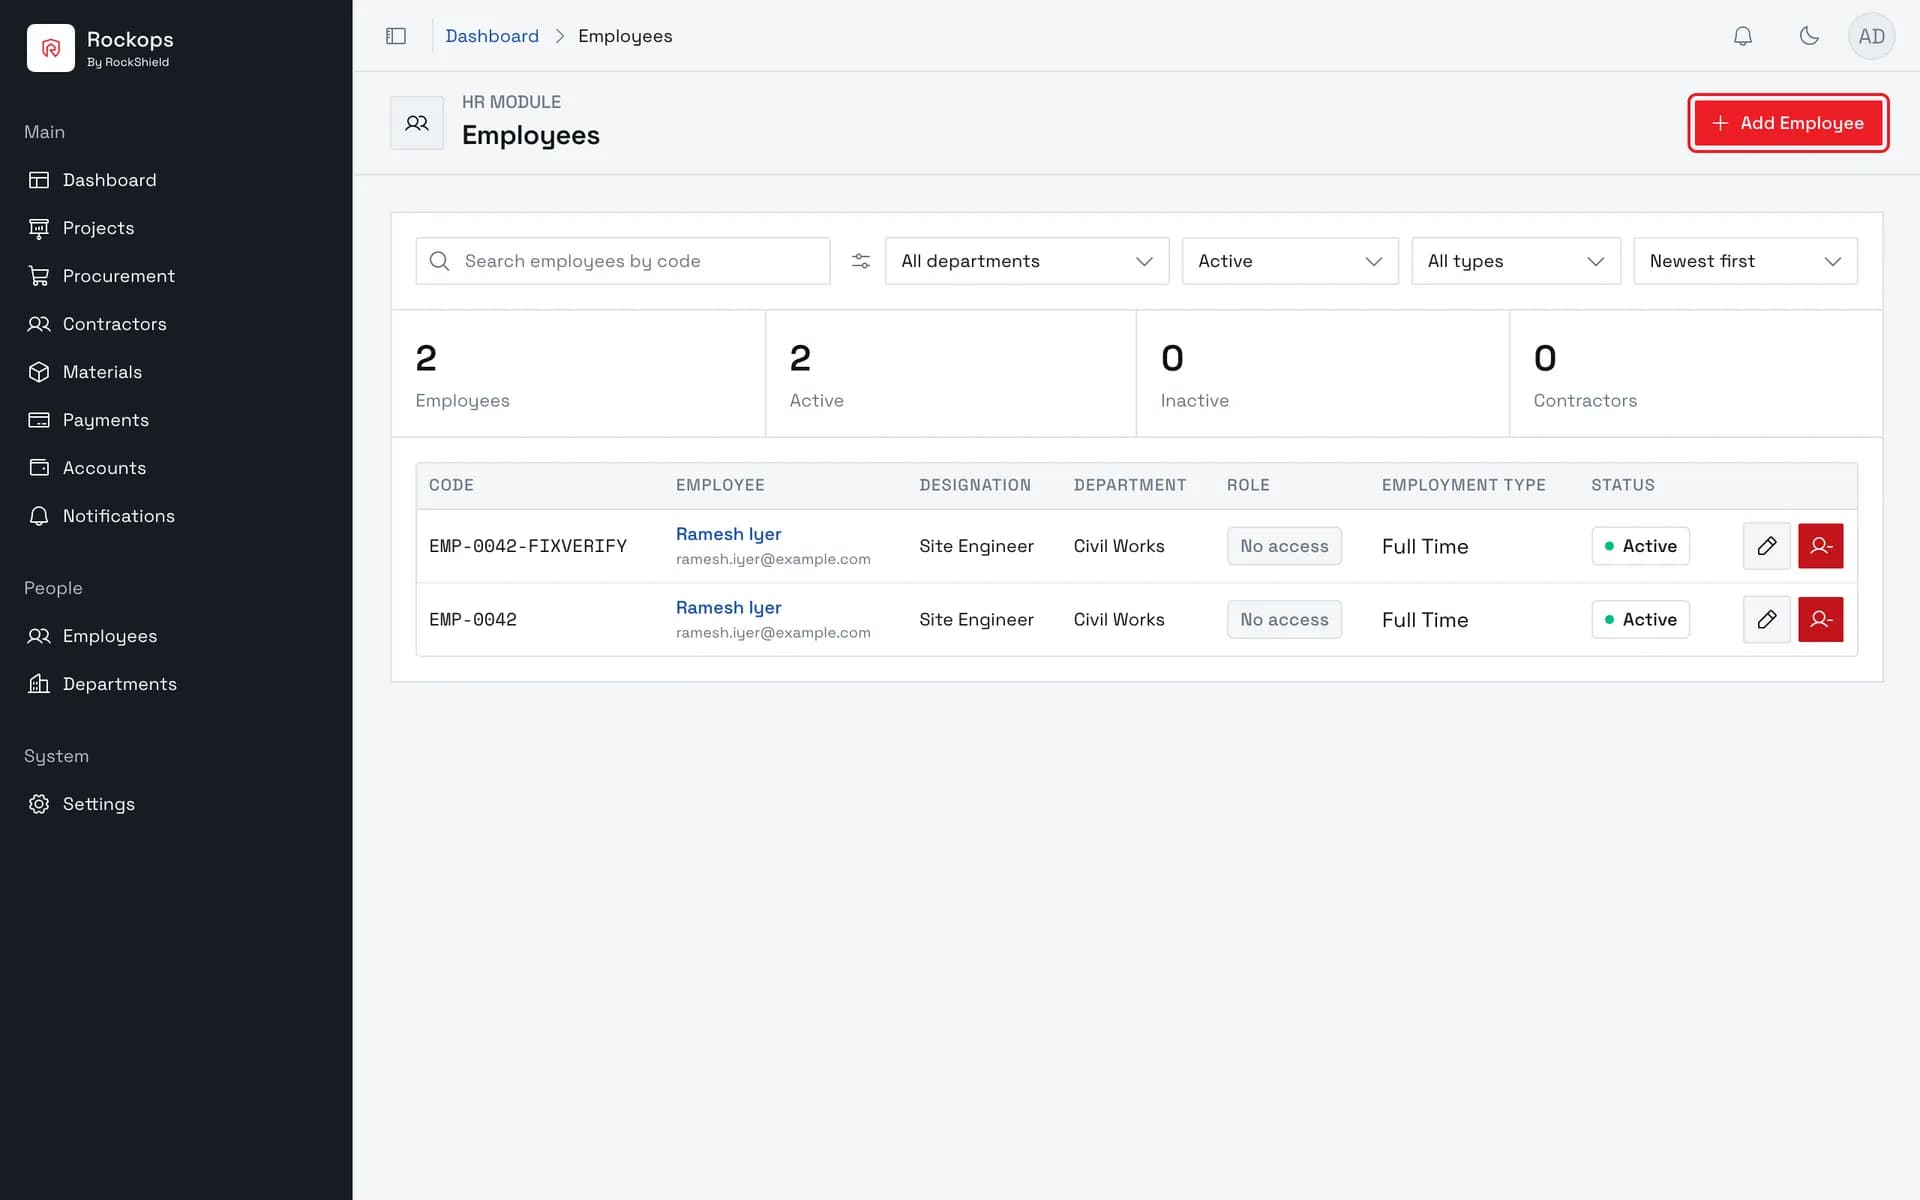
2. The Employees list
Shows every employee with their code, department, and status.
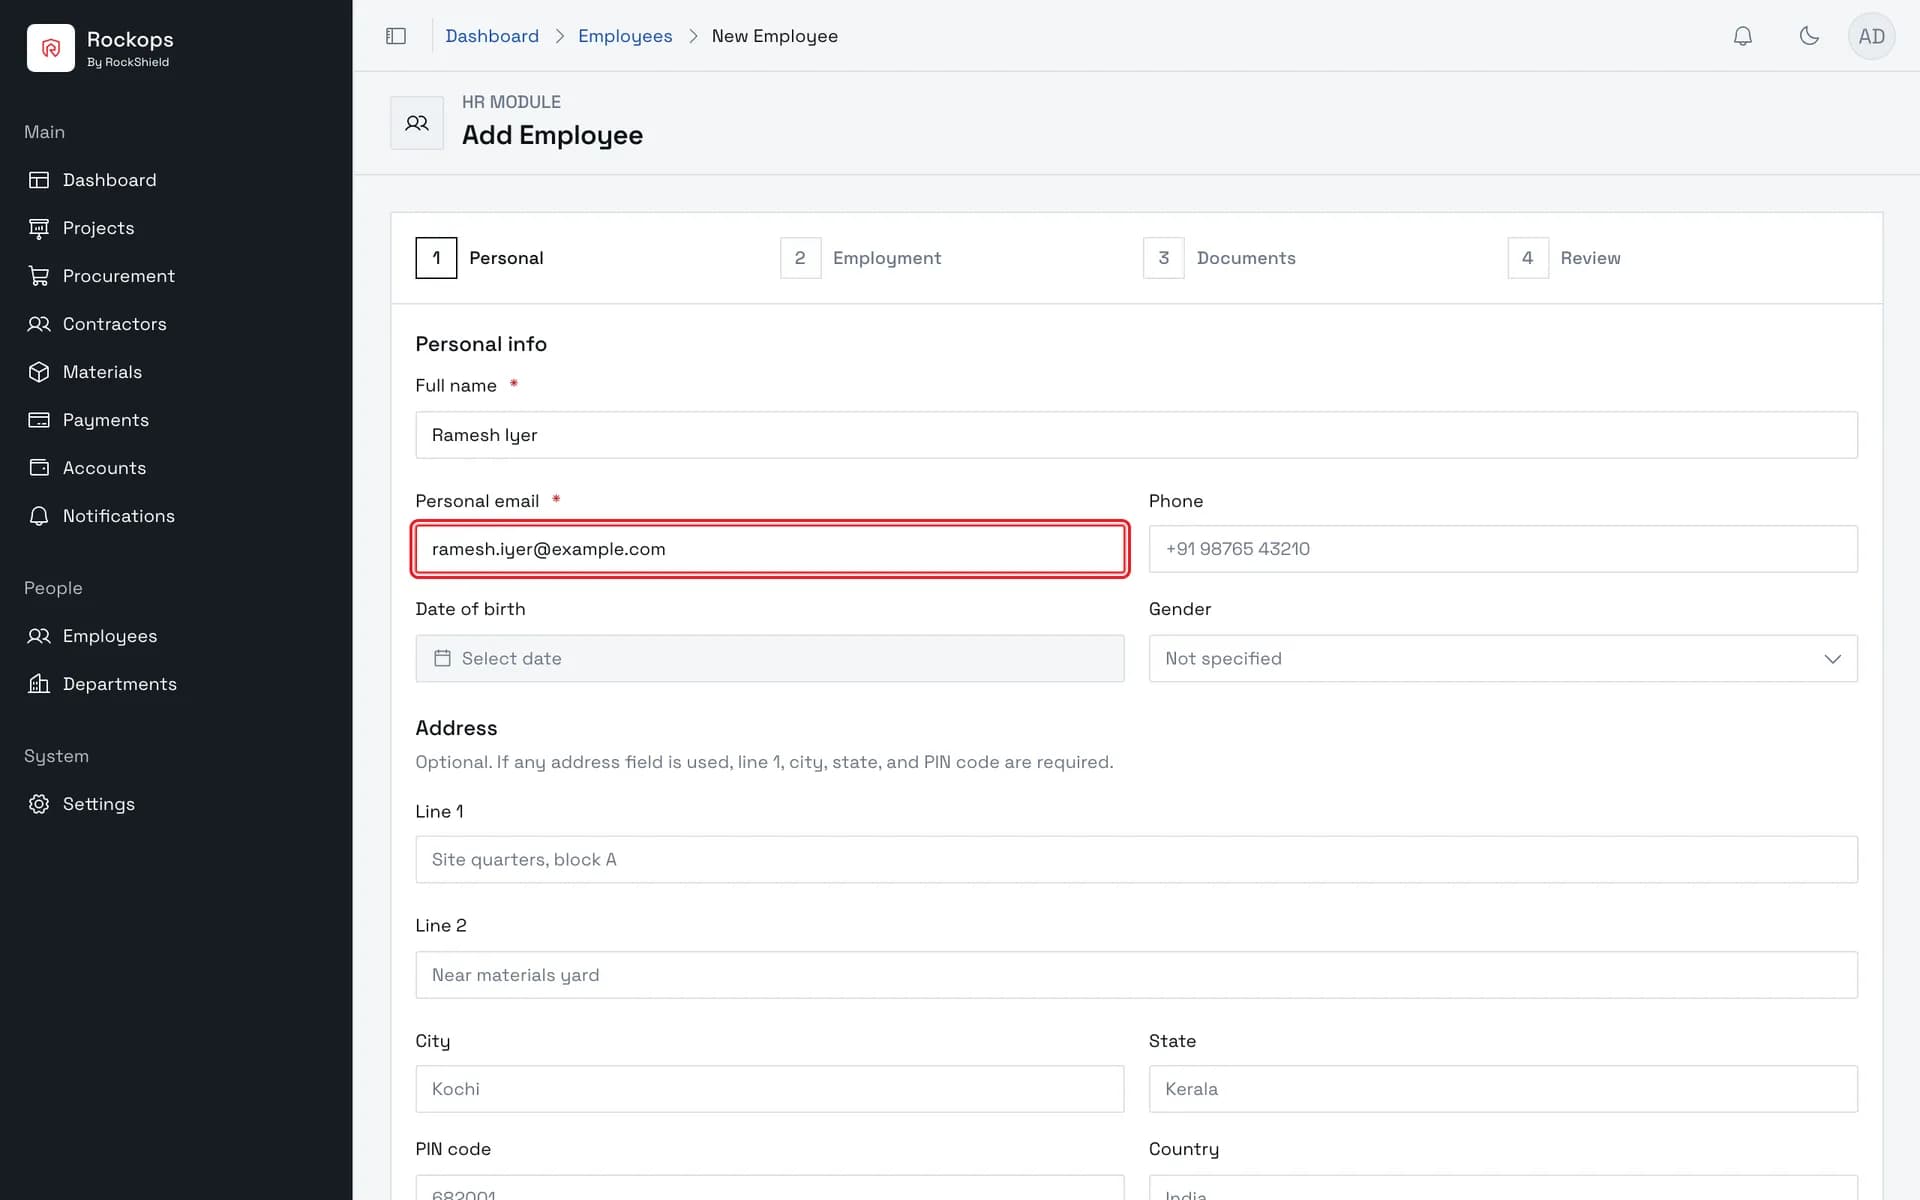
3. Step 1 — Personal
Full name and personal email are the only required fields here; address and other details are optional.
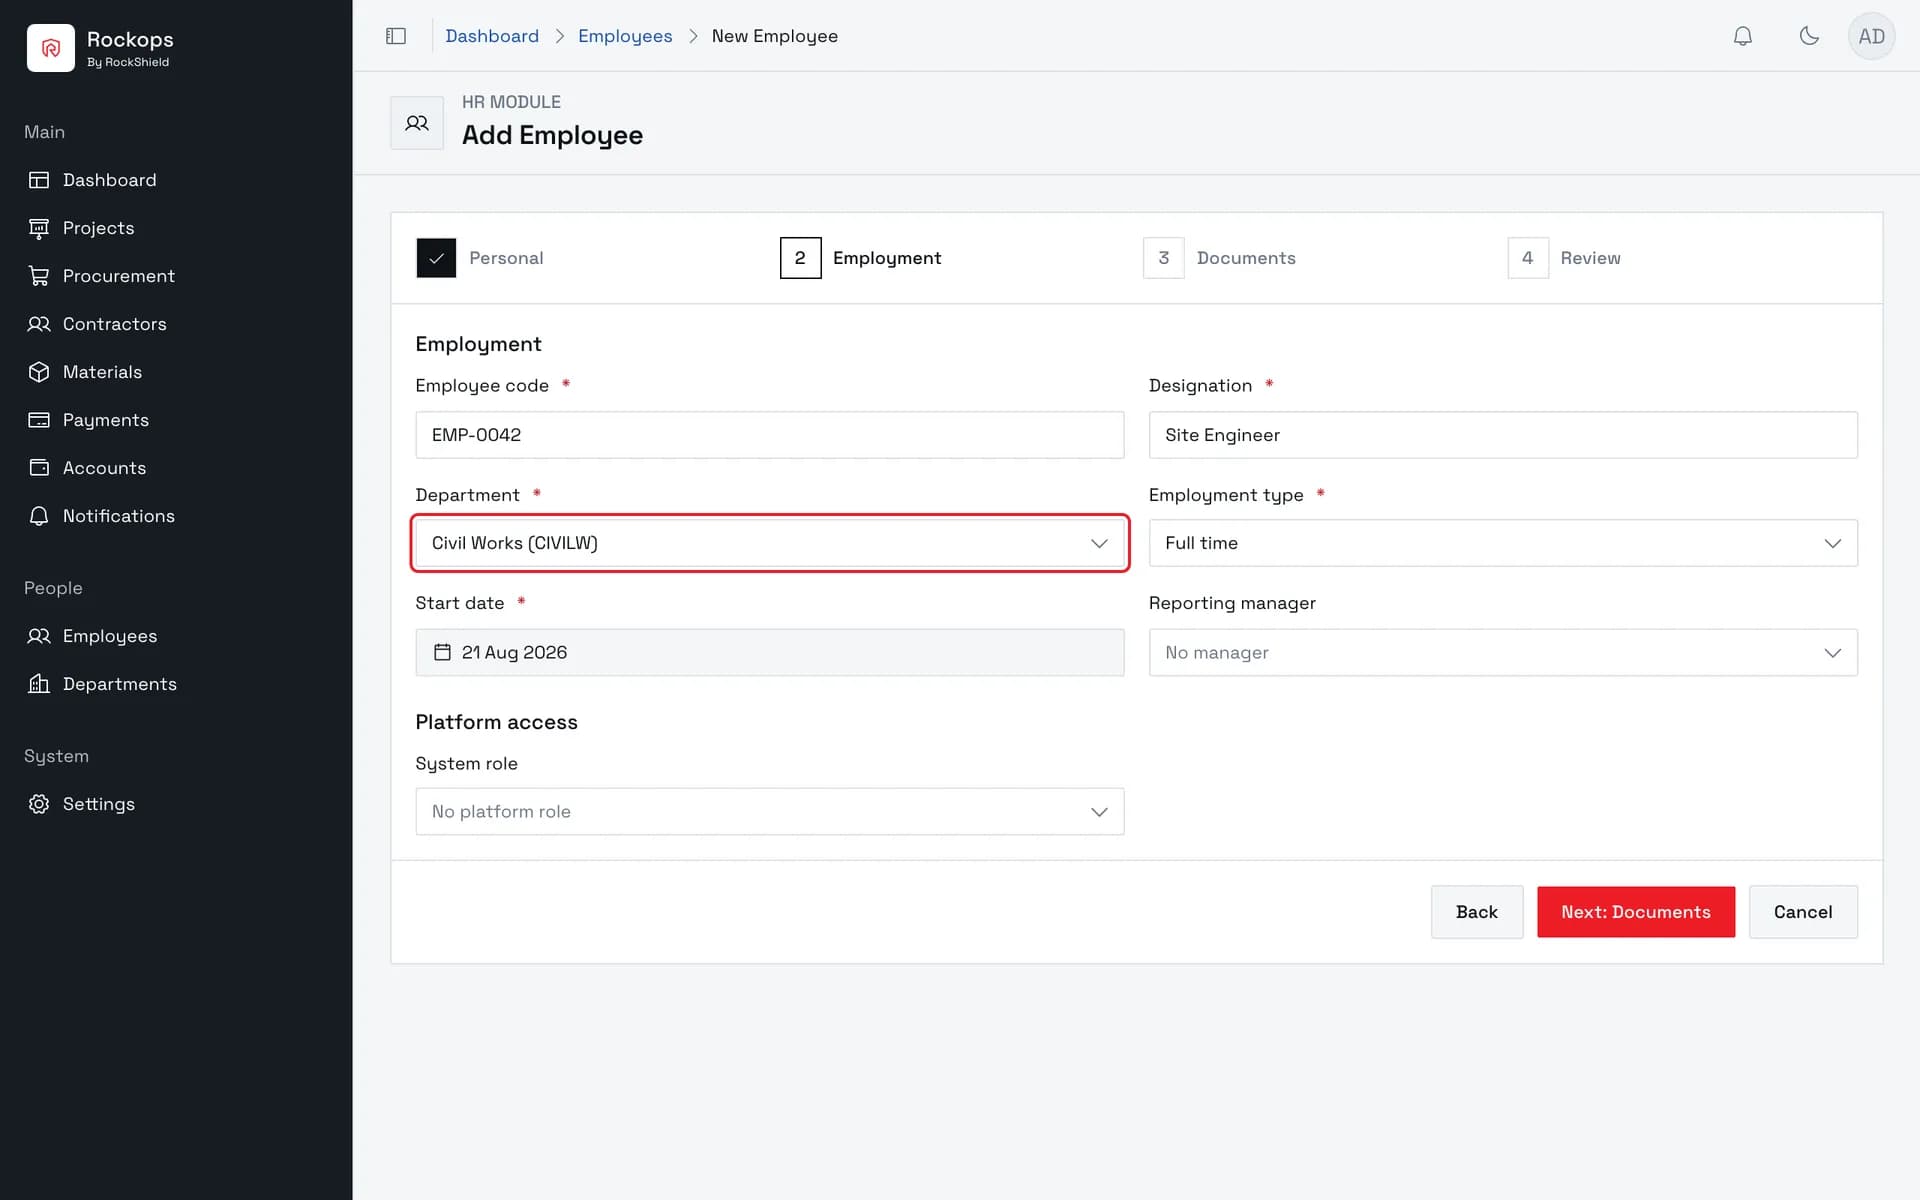
4. Step 2 — Employment
Employee code, designation, department, and start date are required. Employment type is also required, but defaults to Full time.
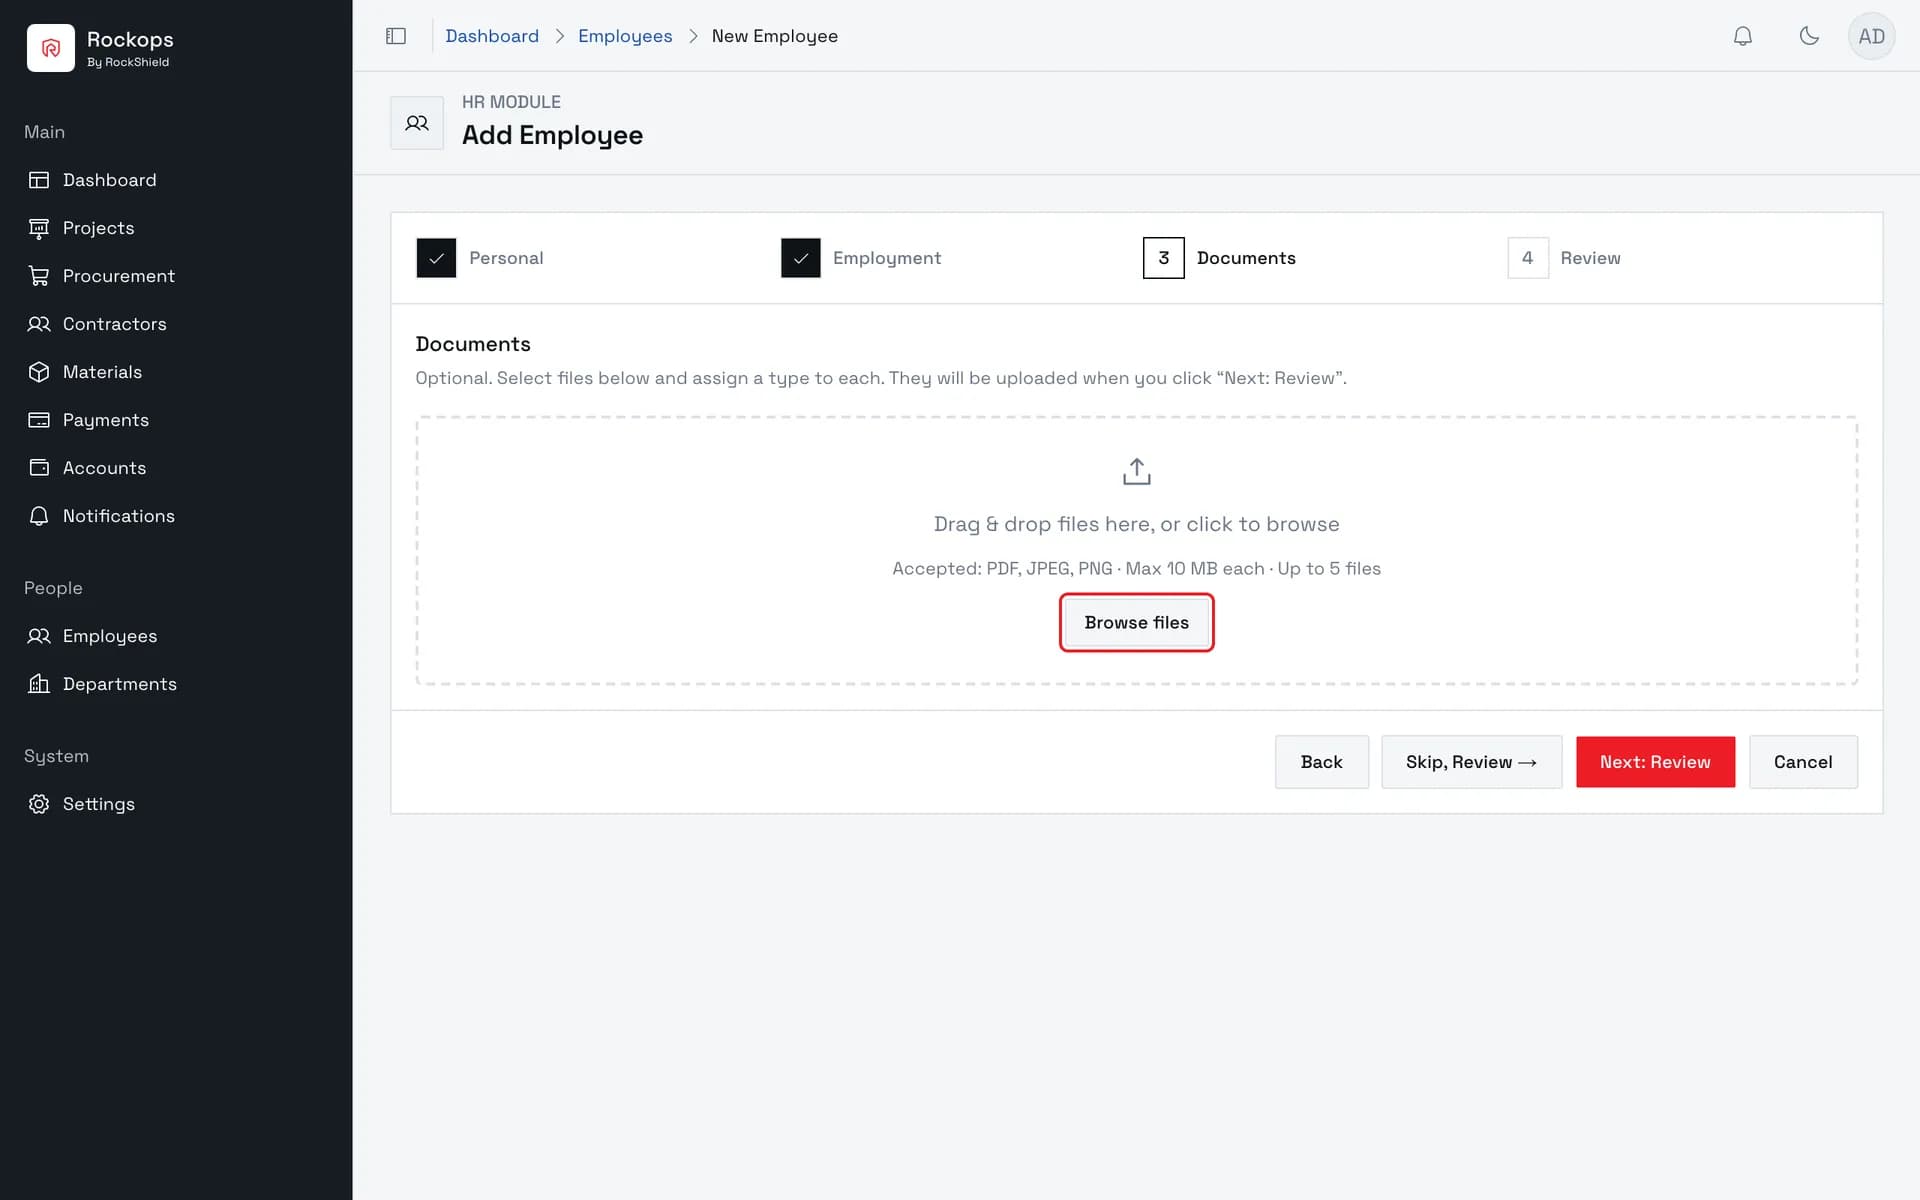
5. Step 3 — Documents
Optional: drag files in or browse to attach ID proof, address proof, or other paperwork. Files upload only once you move to Review.
6. Files staged
Both fixture files are staged with their size, each defaulted to document type Other. Choose "Upload & Review" to upload them and continue.
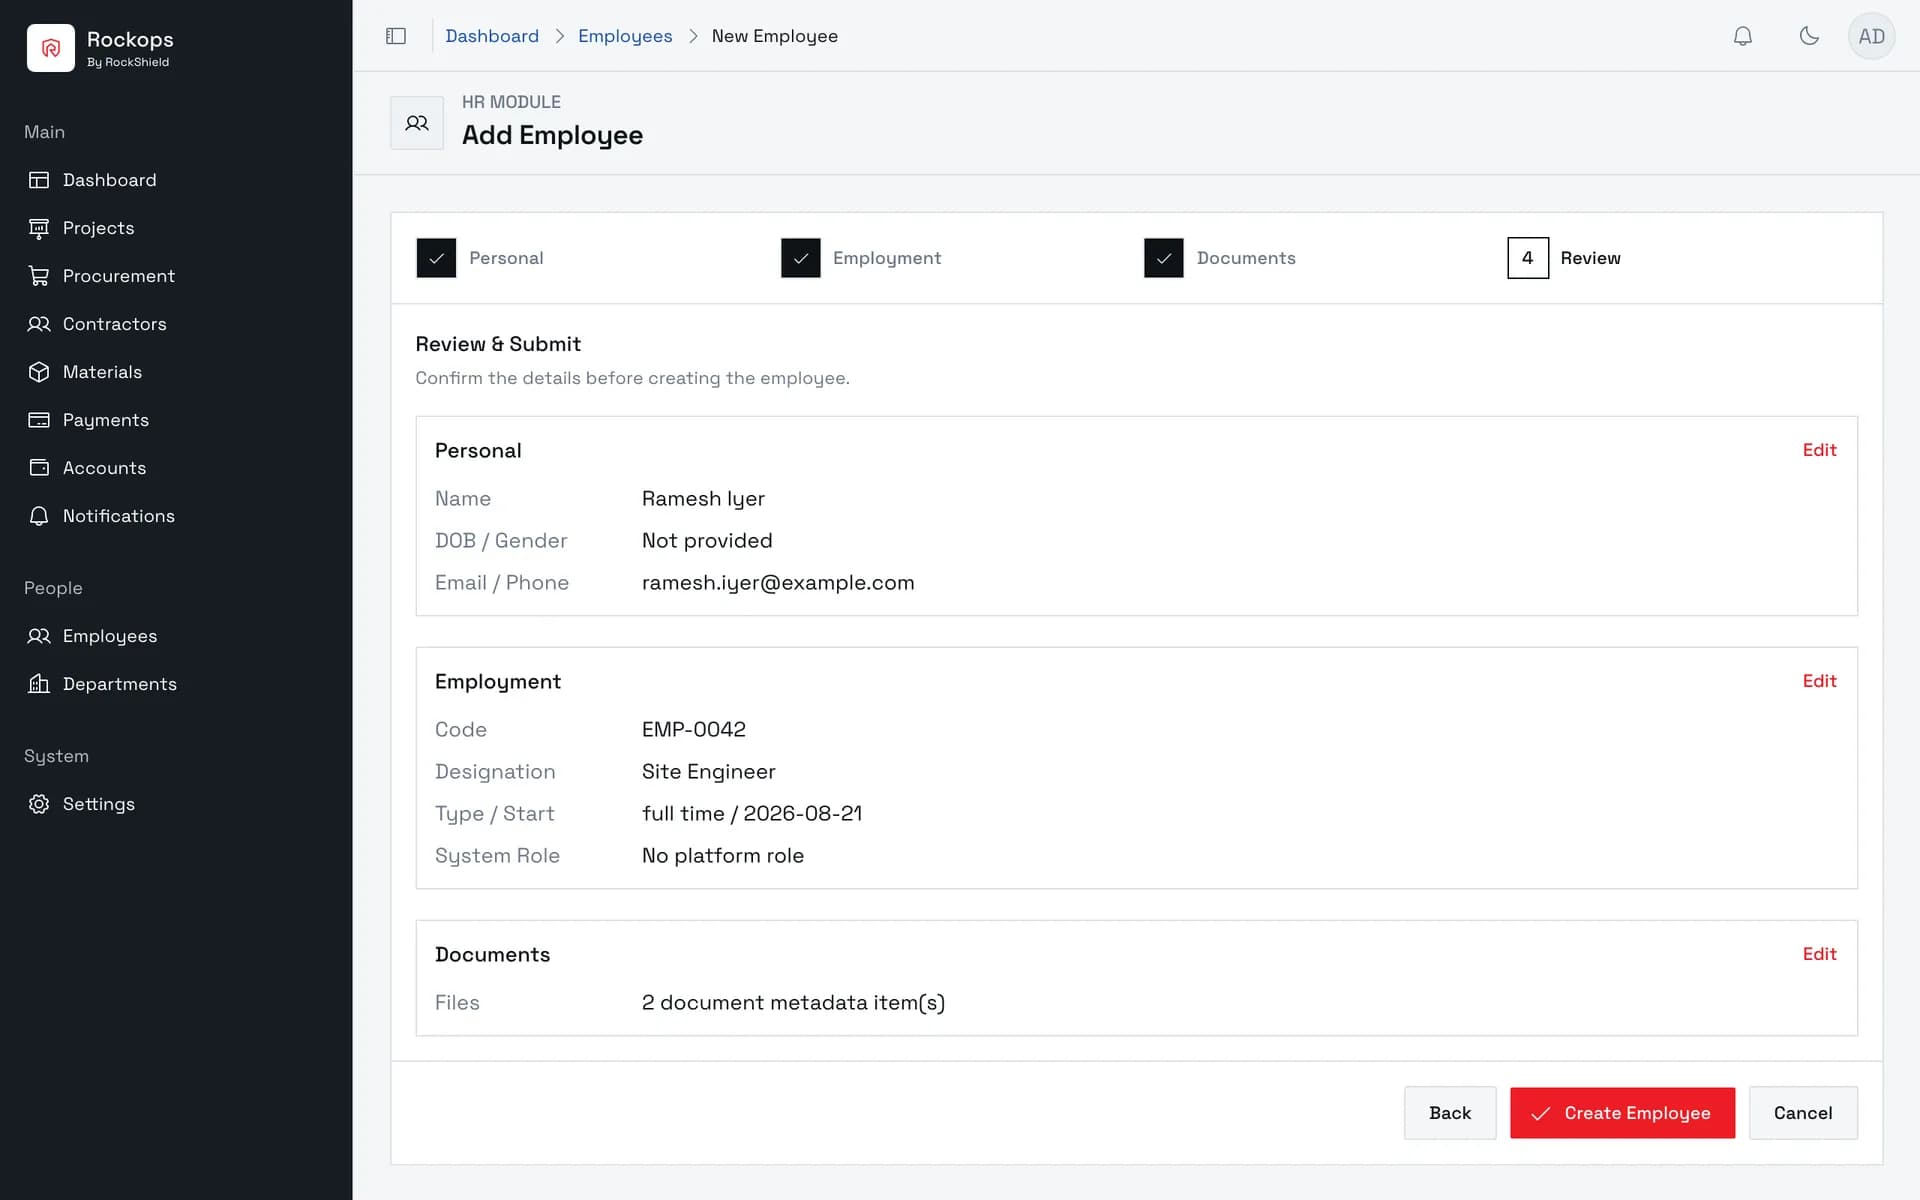
7. Step 4 — Review
Confirm the personal, employment, and document details before creating the employee. Use Edit on any card to go back and change it.
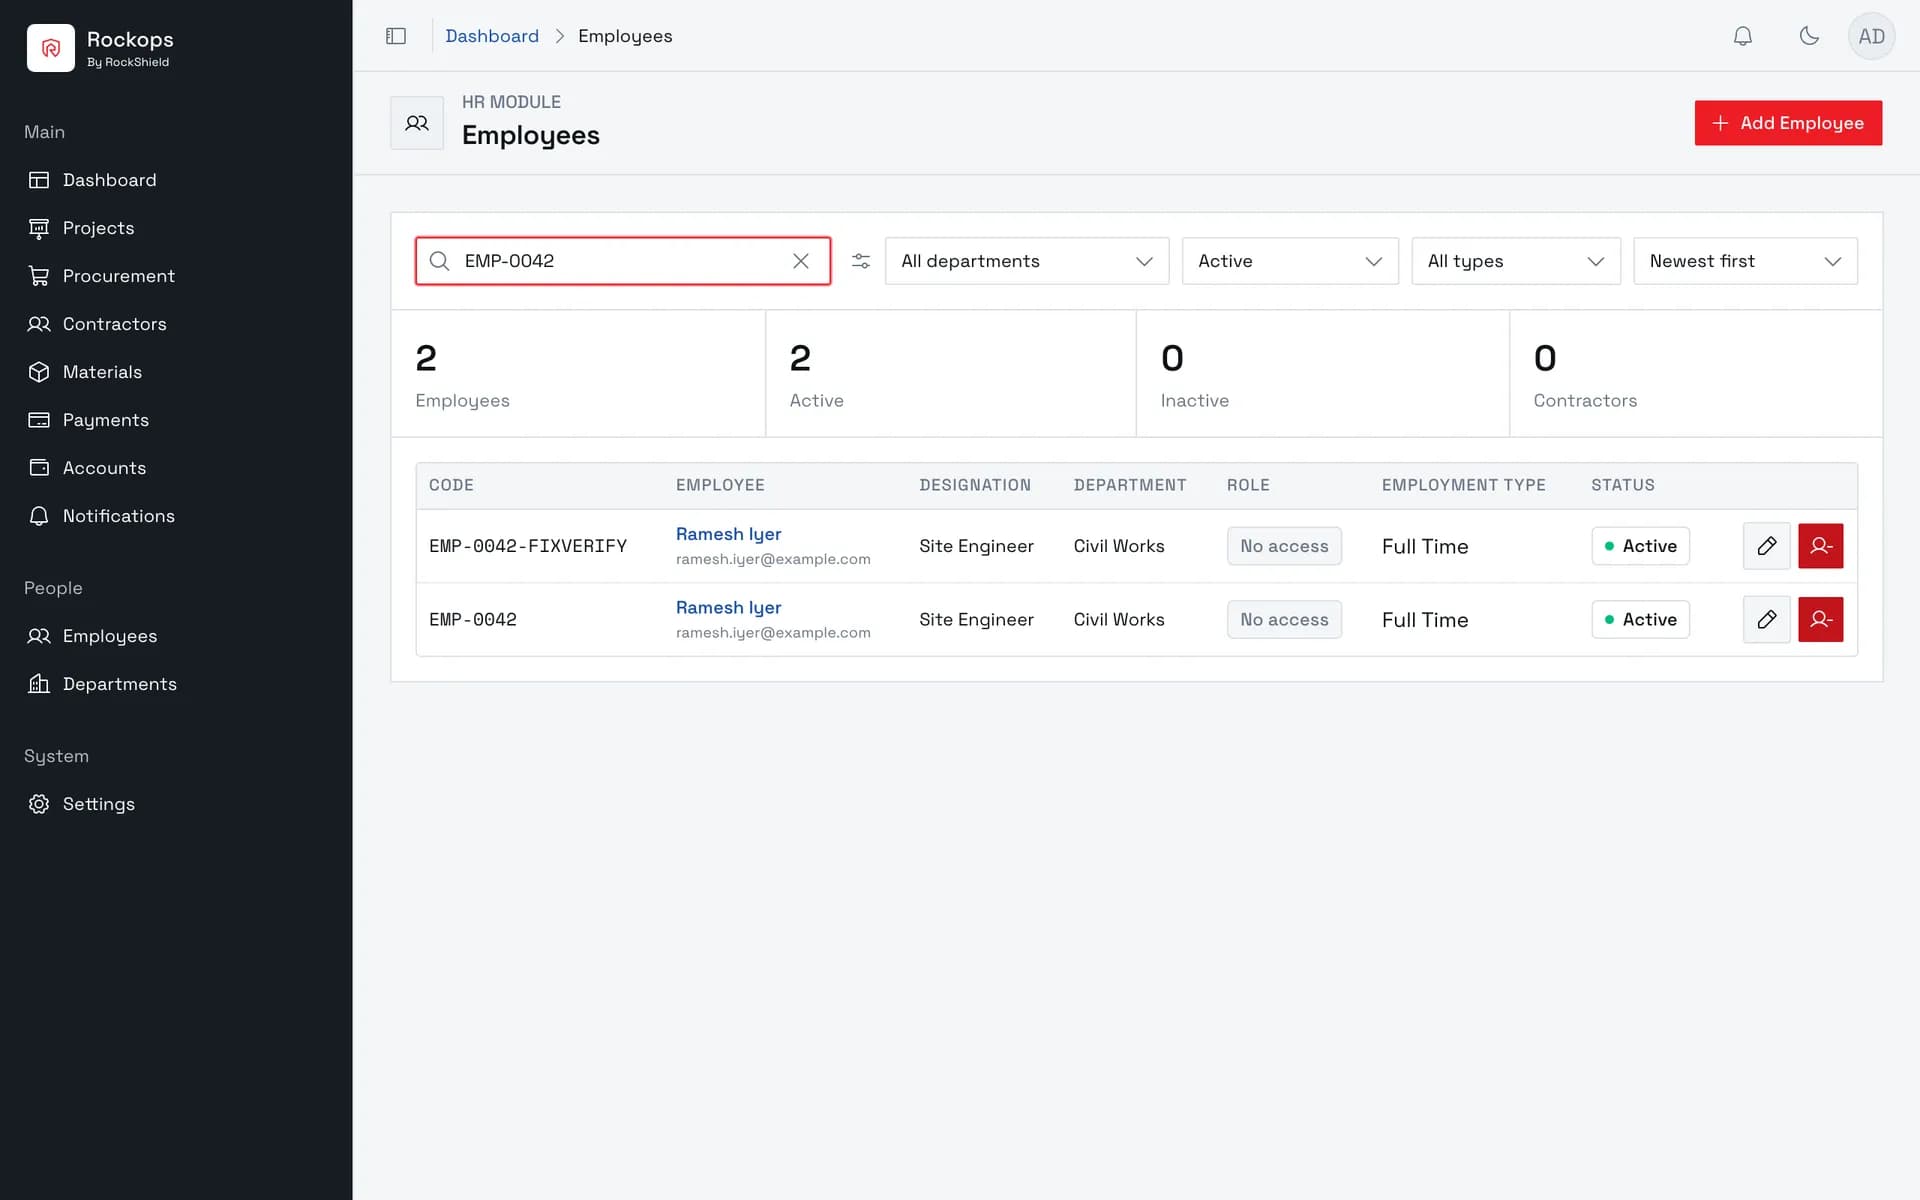
8. Employee created
The new employee appears in the list — search by employee code at any time to find it.
Field reference
Step 1 — Personal
| Field | Required | Rules |
|---|---|---|
| Full name | Yes | Up to 200 characters. |
| Personal email | Yes | Must be a valid email address. Used to send the account invitation later if the employee is given a system role. |
| Phone | No | — |
| Date of birth | No | Date picker; future dates are disabled. |
| Gender | No | Male, Female, or Other. |
| Address (Line 1, Line 2, City, State, PIN code, Country) | No, but conditional | The whole block is optional. If you fill in any address field, Line 1, City, State, and PIN code become required — Line 2 and Country stay optional. |
Step 2 — Employment
| Field | Required | Rules |
|---|---|---|
| Employee code | Yes | Up to 50 characters, no format restriction (unlike department codes, which are locked to 6 characters). Must be unique within the organization — the server rejects a duplicate on submit. |
| Designation | Yes | Up to 255 characters. |
| Department | Yes | Selected from existing departments; the picker shows each department's name and code. |
| Employment type | Yes | Full time, Part time, or Contractor. Defaults to Full time. |
| Start date | Yes | Date picker; no default, so it has to be set explicitly. |
| Reporting manager | No | Selected from active employees. |
| Contract agency | No | Only shown when Employment type is Contractor. |
| System role | No | Grants platform access. Setting this creates the underlying login account immediately, tied to the personal email — but it does not send the invitation. That's a separate "Send invitation" action from the employee's row in the list or their detail page, done afterward. |
Step 3 — Documents (optional)
| Rule | Value |
|---|---|
| Accepted file types | PDF, JPEG, PNG |
| Max size | 10 MB per file |
| Max count | 5 files |
| Document type per file | ID Proof, Address Proof, Offer Letter, Employment Contract, or Other — defaults to Other, editable per file before upload |
A secondary "Skip, Review →" button appears alongside the primary button, but only while the Documents step is completely untouched — no files staged and none uploaded yet — so you're never forced to interact with Documents. Stage a file, or navigate back to this step after already uploading documents earlier in the wizard, and the Skip button disappears; only the primary button remains, labeled "Next: Review" or "Upload & Review" depending on whether files are currently staged.
Step 4 — Review
Read-only summary of the previous three steps, grouped into Personal, Employment, and Documents cards, each with an Edit link back to that step. Submitting creates the employee and takes you to their detail page.
Best practices
- Decide the department first. The Employment step requires picking an existing department, so create it beforehand — see Create a department — rather than abandoning a half-filled wizard to go create one.
- Don't confuse "file selected" with "file uploaded." Documents only leave your machine when you advance from step 3 to Review. If you need to remove or swap a file, do it on the Documents step before continuing — the file list shown on Review is what already uploaded, not what's still pending.
- Only grant a system role when the person actually needs platform access. It immediately creates a login account tied to their personal email; remember a separate "Send invitation" step is still needed afterward before they can actually sign in.
- To set a department's head, create the employee first. The Department head field only appears when editing an existing department, and it only lists employees who already belong to that department — so the order is: create the department, add the employee to it here, then edit the department to assign them as its head.
Troubleshooting
Add Employee wizard lets you fill in every step but submitting does nothing, or comes back with a permissions error — you're signed in as an Organization Manager. That role can see and open the wizard but can't actually create employees; only Administrator, Owner, and Human Resources can.
"Employee code "XXXXXX" is already used by another employee in this organization. Enter a different code." — another employee already has that code. Employee codes must be unique per organization; pick a different one.
A file won't stage, or disappears from the Documents step — it's probably not PDF, JPEG, or PNG, or it's over 10 MB, or you're already at the 5-file limit. Only files matching the accepted types are picked up when dragging and dropping; the file picker enforces the same types via its accept filter.
Stuck on the Documents step after clicking "Upload & Review" — the upload itself failed (a real network round trip to storage). Check your connection and try again; nothing you already entered in earlier steps is lost.
Filled in a city or PIN code but got an error about a missing address field — providing any part of the address makes Line 1, City, State, and PIN code all required. Either fill in the rest of the required fields or clear all address fields to leave the address off entirely.
Can't find "Department head" while creating a department — it isn't available yet; see Create a department. Create this employee, save them to the target department, then edit that department to set them as its head.